Levoit Core 200S - Custom Firmware (ESPHome)
Quick Facts
| Item | Value |
|---|---|
| Model | Core 200S |
| Tested MCU FW | 2.0.11 |
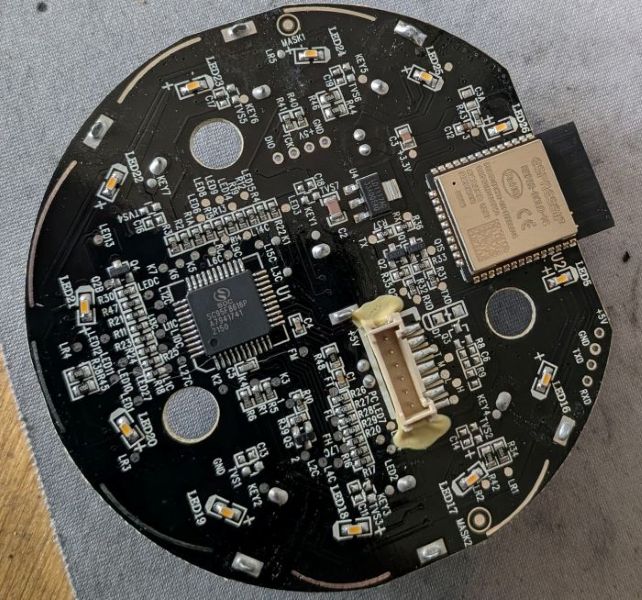
| ESP Module | ESP32-SOLO-1C |
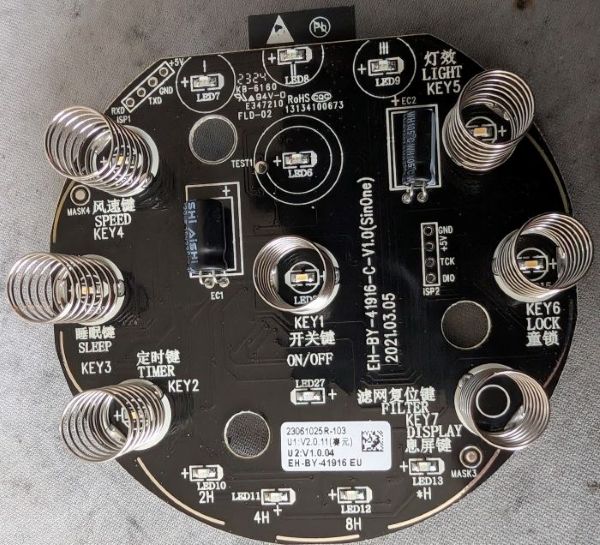
| Board | EH-BY-41916-C-V1.0 (SinOne) |
| Fan Speeds | 3 |
| CADR (spec) | 167 m³/h |
| Room Size | up to 40 m² (430 ft²) |
| ESPHome | 2026.1.2+ |
| PM Sensor | None |
Features
| Feature | Type | Notes |
|---|---|---|
| Fan | fan | 3 speeds, presets: Manual / Sleep |
| Display | switch | Toggle LED display |
| Child Lock | switch | |
| Night Light | select | Off / Mid / Full |
| Current CADR | sensor | m³/h, updated every 5s |
| Filter Life Left | sensor | % remaining |
| Filter Low | binary_sensor | On when < 5% |
| Filter Lifetime | number | Configurable in months |
| Reset Filter Stats | button | Resets CADR/runtime counters |
| Timer | number | Run timer in minutes |
| MCU Version | text_sensor |
No PM2.5 / AQI sensor on this model. No Auto mode.
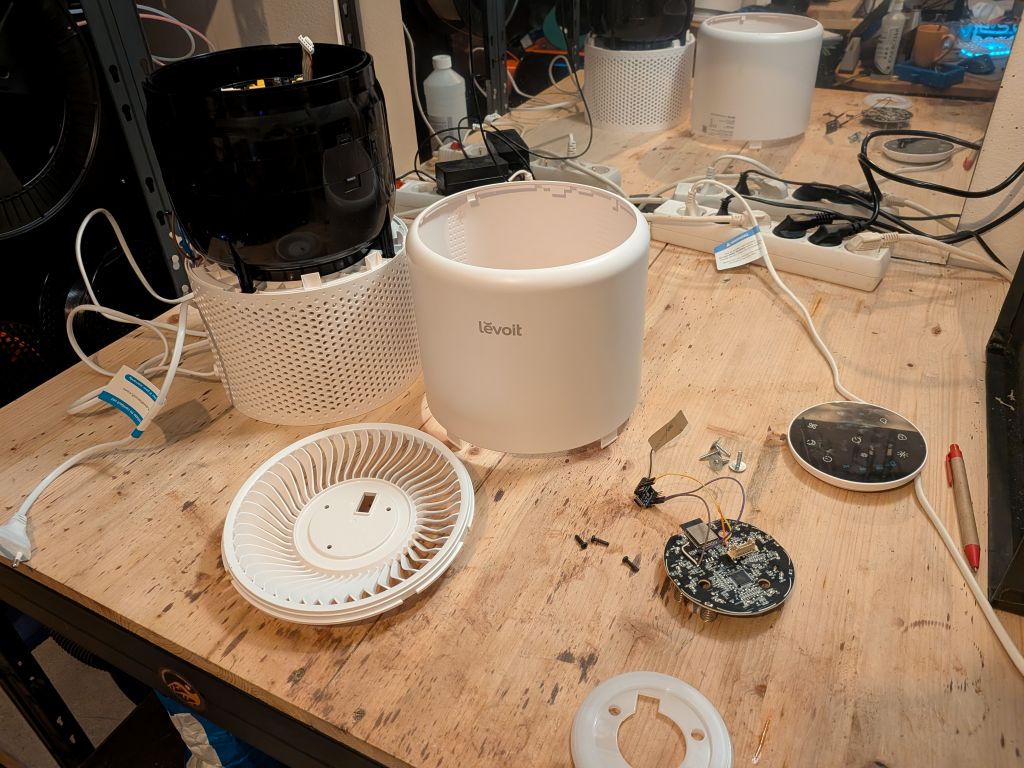
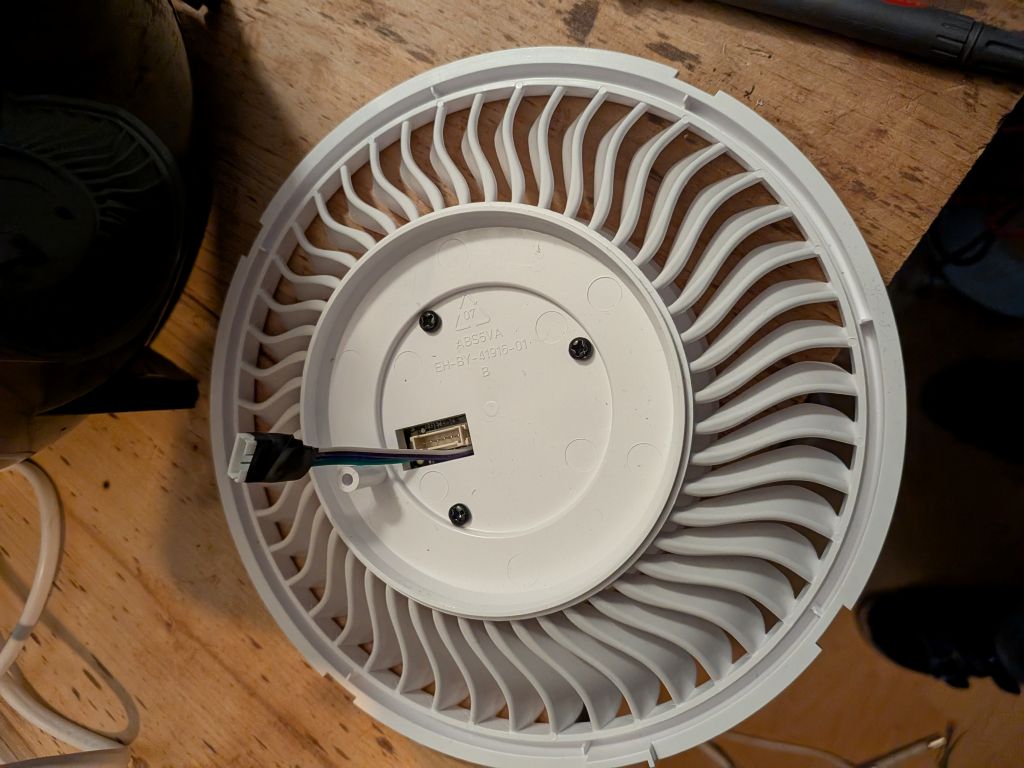
Teardown / Disassembly
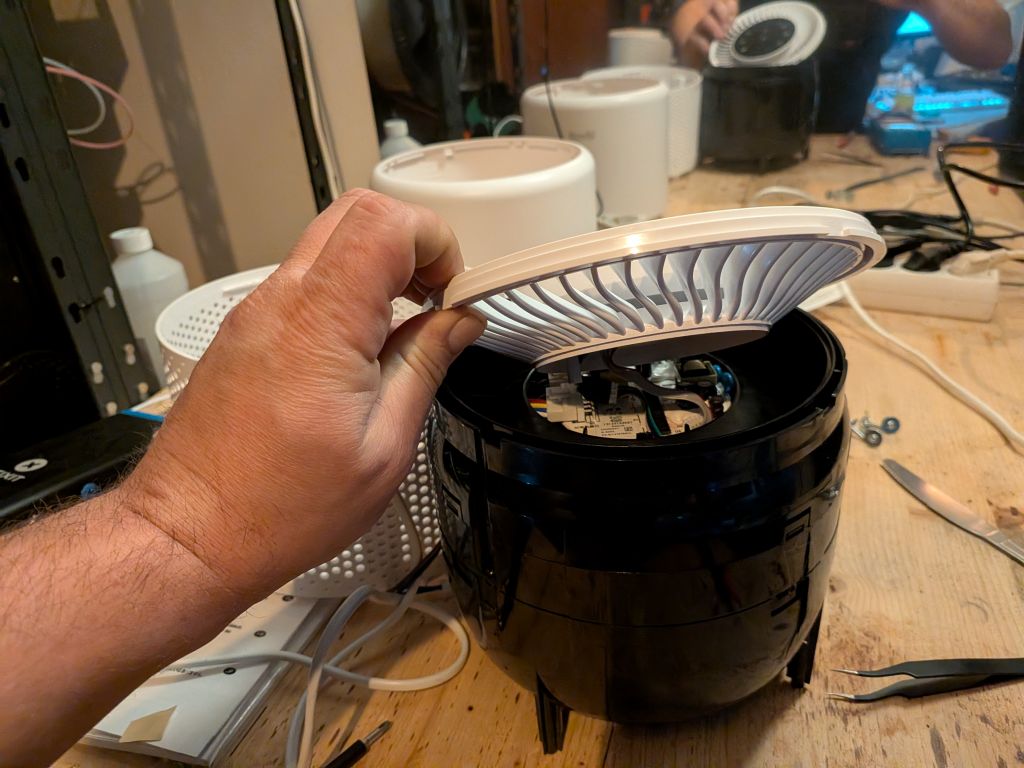
- Place upside down, remove base cover and filter to expose screws
- Remove all screws — they are soft metal, do not overtighten when reassembling
- Slide a pry tool between the tabs to separate base and top sleeve, the top should go inside
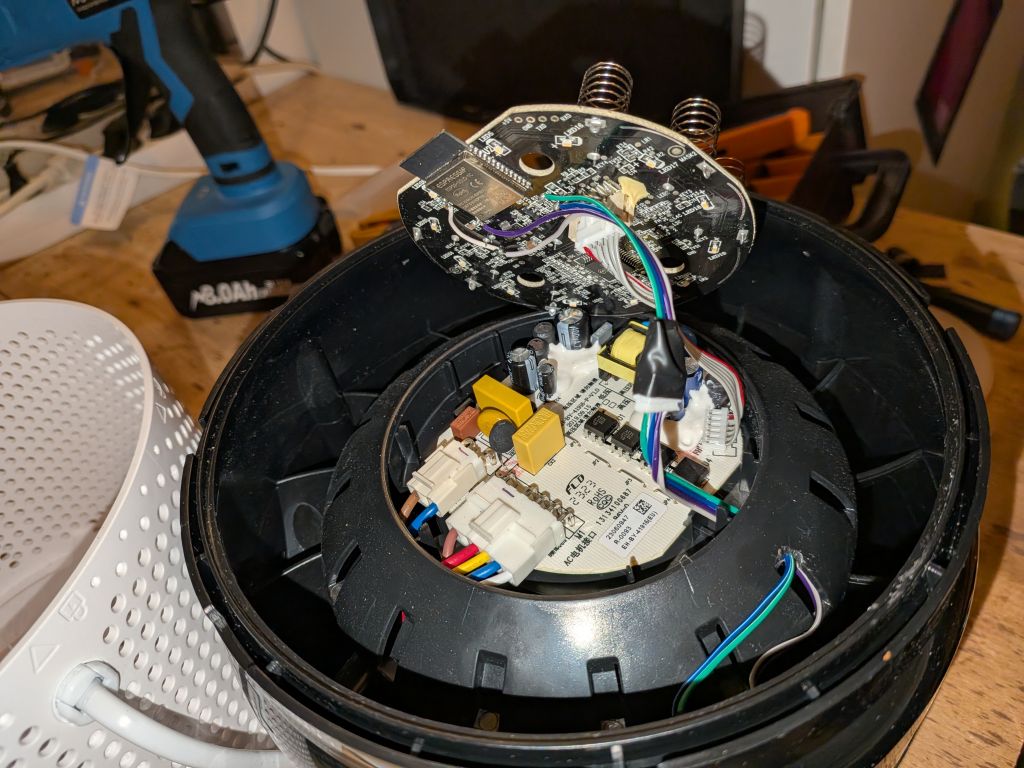
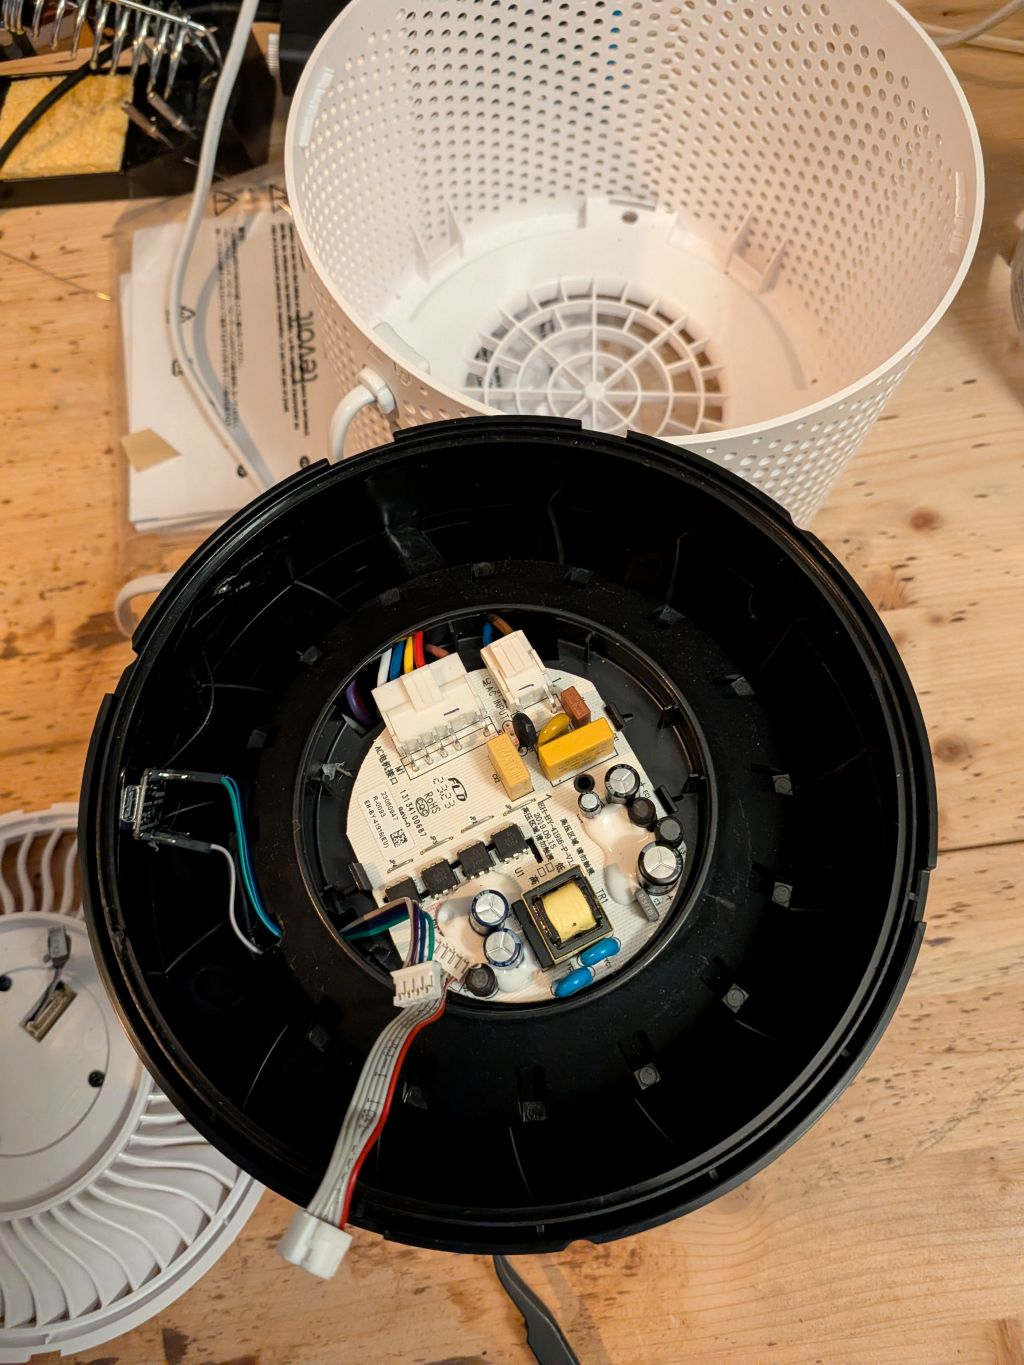
- Unscrew the logic board / top module
- Unplug the logic board
PCB
Install New ESP32 (Recommended)
Replacing the original ESP32 lets you keep the original firmware intact and switch back easily.
Wiring (ESP32-S3 example):
| PCB | ESP32-S3 |
|---|---|
| EN | GND |
| 3.3V | 3.3V |
| GND | GND |
| RX | GPIO05 |
| TX | GPIO04 |
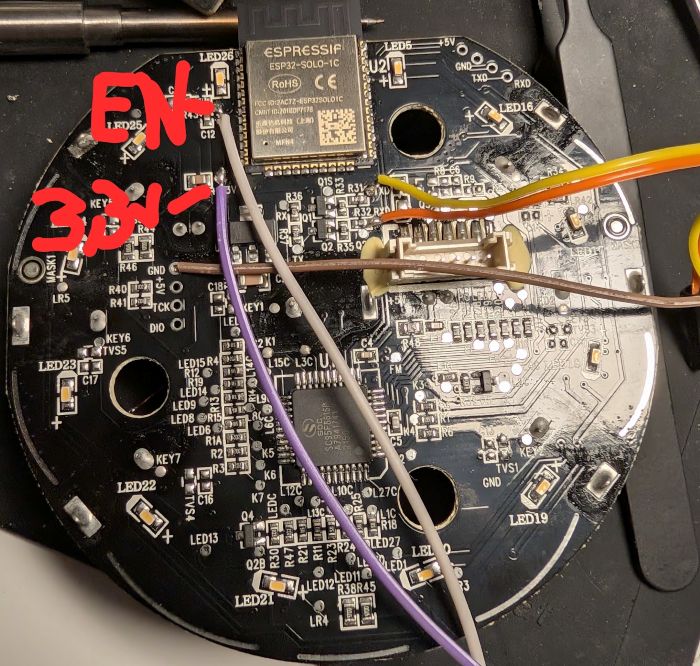
Pull the
ENpin of the original ESP32 to GND to disable it.
Recommended modules:
- Seeed XIAO ESP32-C3
- Seeed XIAO ESP32-S3
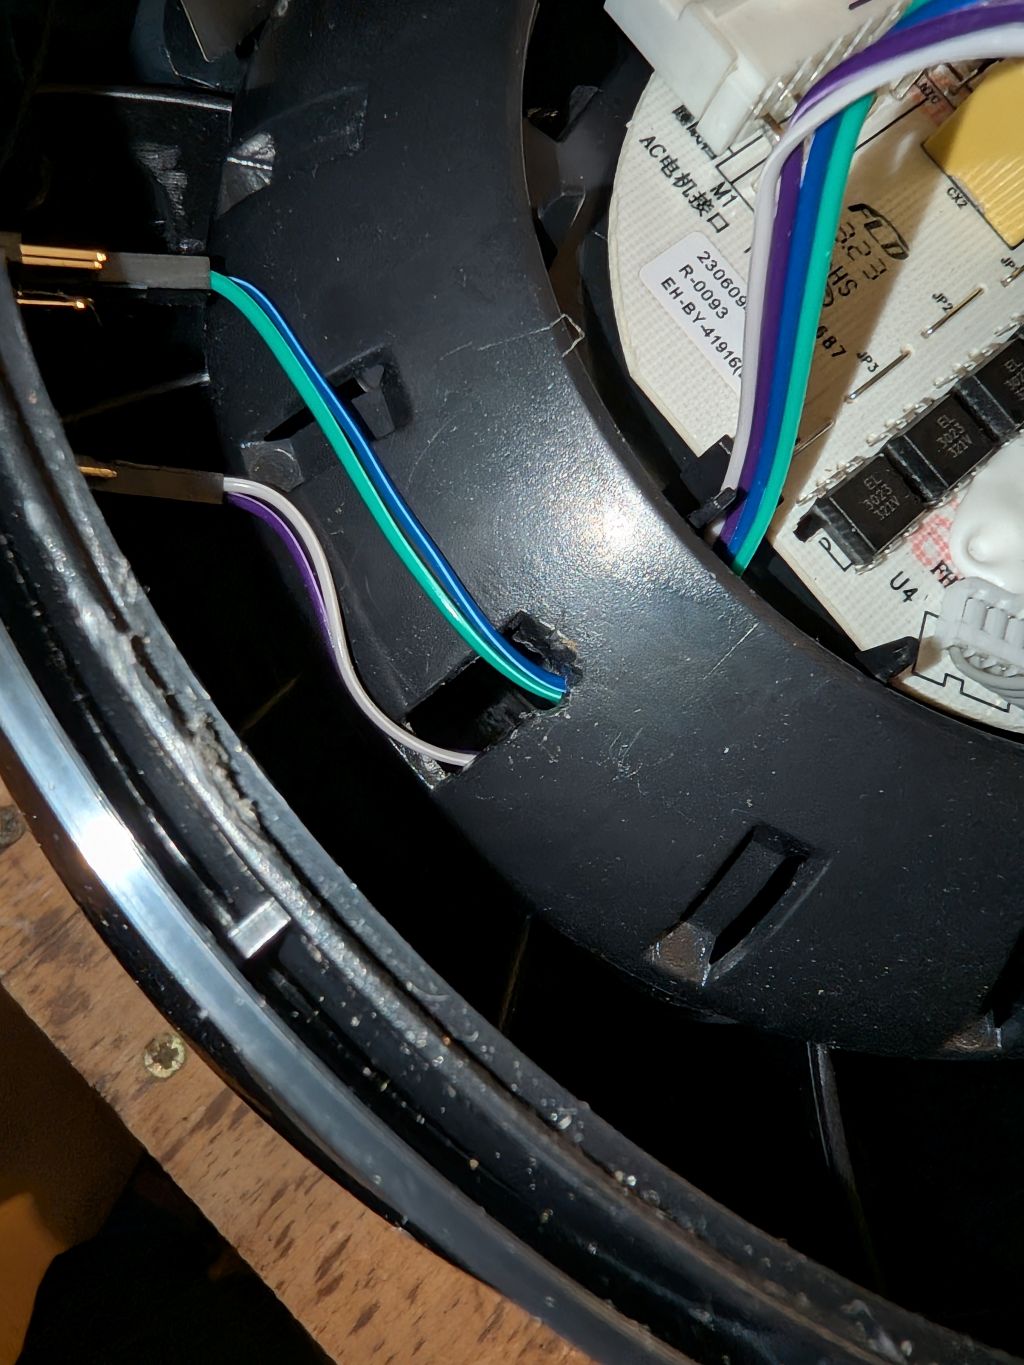
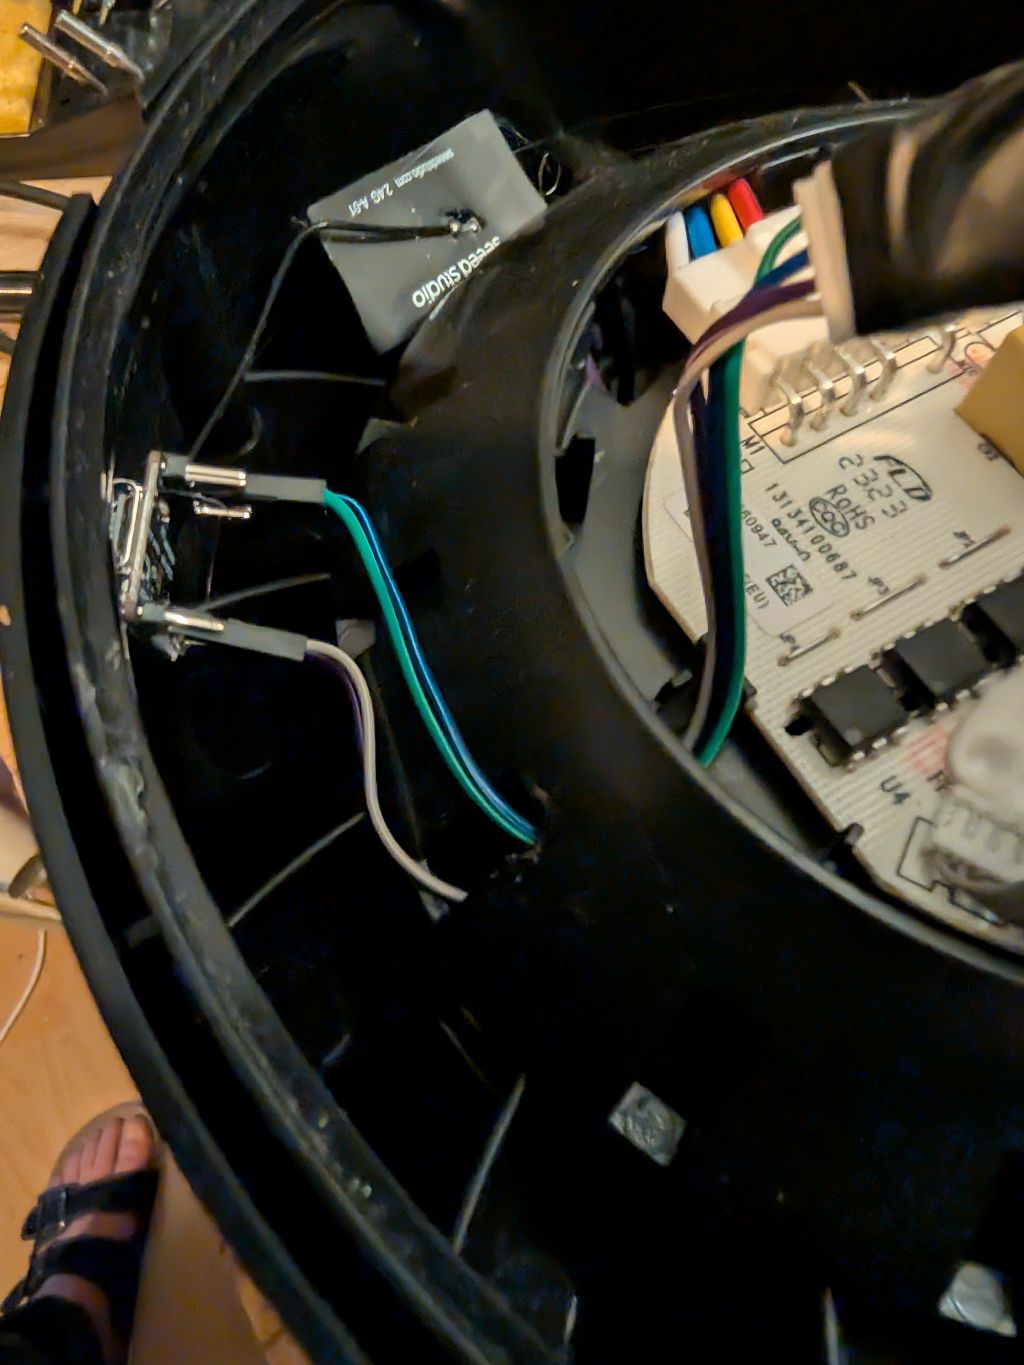
Placement of new ESP
No room to fit the esp32! i placed mine outside in the airstream. I had to break out a small part to get the wires through.
Flash Original ESP32
Prerequisites
Solder wires to TXD0, RXD0, IO0, +3V3, GND near the ESP32 on the logic board and connect to a USB-UART converter (3.3V TTL).
Connect IO0 to GND before powering on to enter bootloader mode.
Backup Existing Firmware
esptool read_flash 0 ALL levoit-core200s-backup.bin
Note: backup may fail on some boards — proceed at your own risk.
Configure
- Copy
secrets-example.yaml→secrets.yamland fill in your Wi-Fi and encryption key - Adjust the device name in the config if running multiple units
- Check the component README for UART pin mapping per board
Flash
esphome run levoit-core200s.yaml
Reassemble and enjoy!
ESPHome Web Builder / Dashboard
Use the pre-generated builder yaml to flash without a local clone — all config is inlined, no !include or packages needed:
| File | Board |
|---|---|
levoit-core200s-builder.yaml |
original ESP32-SOLO-1C |
levoit-core200s-builder-c3.yaml |
ESP32-C3 replacement |
levoit-core200s-builder-s3.yaml |
ESP32-S3 replacement |
Upload to the ESPHome web builder or paste into the ESPHome dashboard. Regenerate with .\make-builder-yaml.ps1 from the devices/ folder.
Restore Original Firmware
esptool erase_flash
esptool write_flash 0x00 levoit-core200s-backup.bin